Wednesday, May 24, 2006

Our windlass crapped out on us on the long weekend. At first we thought it was the solenoid and we went and bought an auto solenoid and installed it, WRONG, auto solenoids are not the same and would have screwed up the system. So after Barry and a buddy mucked around with the wiring for most of the day we called an expert. He proceeded to test everything and discovered the wire that ran from the solenoid to the windlass motor at the deck connection was badly corroded and falling to pieces. He took the windlass motor in for an upgrade and we had to replace the corroded wire.

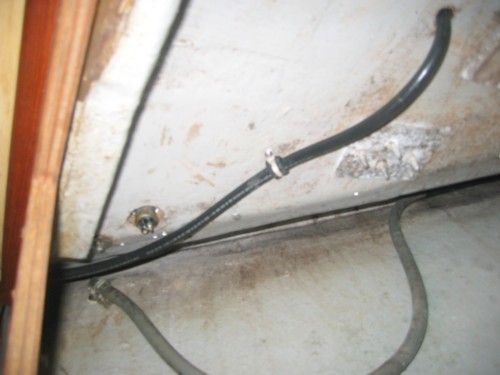
It was a real challenge because the wire was buried behind wood in our v-berth so we had to practically dismantle the wood to get at the wiring. I took a series of pictures to show you where the wire went to and what we had to do.
Picture 1 shows you wire coming through the deck and into the anchor locker
Picture 2 shows the wire runningdown the front edge of the v-
berth behind a board. This was the board that caused us the most problems. We had to take it off, the screws were buried under teak plugs, then we had to take a ceiling board off that was holding it in and we had to undo the railing for the shelf that runs the length of the v-berth, NOT FUN.

Picture 3 is this little we hatch that the wire entered when it came from the wall. You had to squeeze your hands in there and manipulate the wire around to get it out.

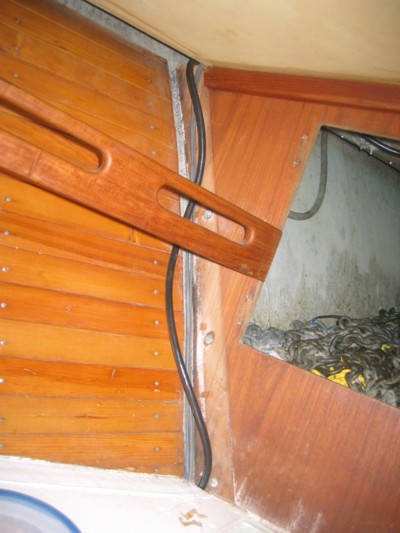
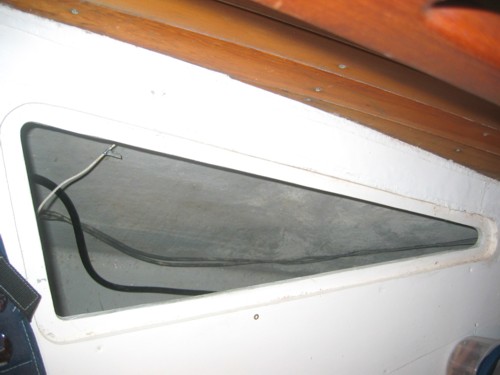
Picture 4 is off the hatch beside our fuel tank in the v-berth, that is why it is a triangle shape. The wire runs through this hatch and connects to the solenoid.

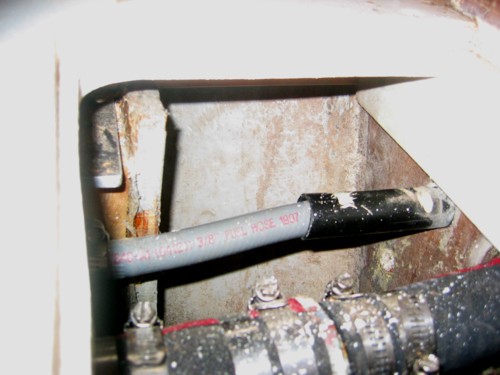
Picture 5 is the solenoid. It was replaced with the auto solenoid that will not work. We had temporarily put the old solenoid back but on further thought Barry went and bought a new one and will install it. The other wire from the motor is just as difficult to get at. It runs all the way up to the front of the mast under the floorboards. We have got it out but have not replaced it yet. The old wire was all copper wire and we have upgraded it with tinned wire.

Now all we have to do is wait for the motor to be reconditioned and we will head up island with a wonderful dependable windlass. It is just as well we came back to Sidney to get it fixed because we have been to and fro alot to the chandlery.

Monday, May 22, 2006

Lee Cloths


I have finished making and installing lee cloths for the two main settees. There was one already made for the aft cabin and it is recommended that you have enough for all persons that you would have onboard, so I made three more, for the settees and for the quarter berth.
First I measured the settees and figured out how wide I wanted the cloths and then I took our old main sail and cut the sail up into the sizes that I wanted. Then I bought some webbing. I folded a small seam in the sail cloth and then folded it over as thick as the webbing and pinned it. I tried to use regular pins but they wouldn't go through all that tough material, so I ended up using macrame t-pins. I asked around to see if I could borrow an industrial sewing machine, but no luck. I took the pinned lee cloths to a canvas repair guy and he sewed them for $30.00, and he did it in 4 days. I thought that was a real deal.
I bought a grommet kit and put grommets along the top of the cloths. It was really hard to make the holes to get the grommets in the cloth. The punch that came with the gommet kit was not good enough to punch through the webbbing and sail cloth, so we ended up drilling the holes for the grommets. Then I had to trim the holes up with a pair of scissors, this was really fiddily and tedious. I should have used an awl, I think I have one on board. Then Barry helped me screw down the lee cloths into the plywood of the settees. We used really big washers so that the cloth will not rip under pressure. I strung some line through the gommets and hung them from the grab rails at the top of the settees.
I cut the sail cloth 20 inches high and if I had it to do again I would make them a bit higher. I did not take into account the width of the cushion when I was measuring. When I got into the settee and laid down I found that I was in there pretty securely I don't think I or anyone else would fall out, but they do look a little short, although you can see over them fairly well and do not feel like you are in a coffin, which is what it looks a bit like.

Monday, May 08, 2006


We have been busy since we came back from Neah Bay. The sole or cabin floor needed to be refinished. The varnish was wearing out and there were black worn spots on the sole where there was the most traffic. It took 2 and 1/2 days to varnish the floor, we had to do it inside the boat because the most of the floor is permanent. The pieces that we can remove to get to the bilge we took out and put the first 2 coats on the dock since it was nice and sunny, for coats 3 and 4 we took the pieces up to the club house and used the workroom there. While we were sanding there was sawdust all over the place, it was just thick everywhere that we had not been able to cover up. After we had finished sanding we cleaned the boat from top to bottom. We vaccumed and wiped down everything we could find. We took all the cushions out and used Barry's Mom's carpet cleaner to give them a good cleaning. This is what it looks like when you don't have a garage or basement to do any work, just a dock.

I am now on my 4th coat of varnish and the sole is starting to really shine. I am going to put one more coat on and hopefully that should be enough. It has been difficult living on the boat while unable to use the floor so we have come up to Barry's Mom's house and spent the night a couple of times. It takes up to 24 hours for a coat to dry and the last coat we let dry for 48 hours before attempting another. It has been a lot of work but hopefully worthwhile in the long run. I will post a picture once we are done.